

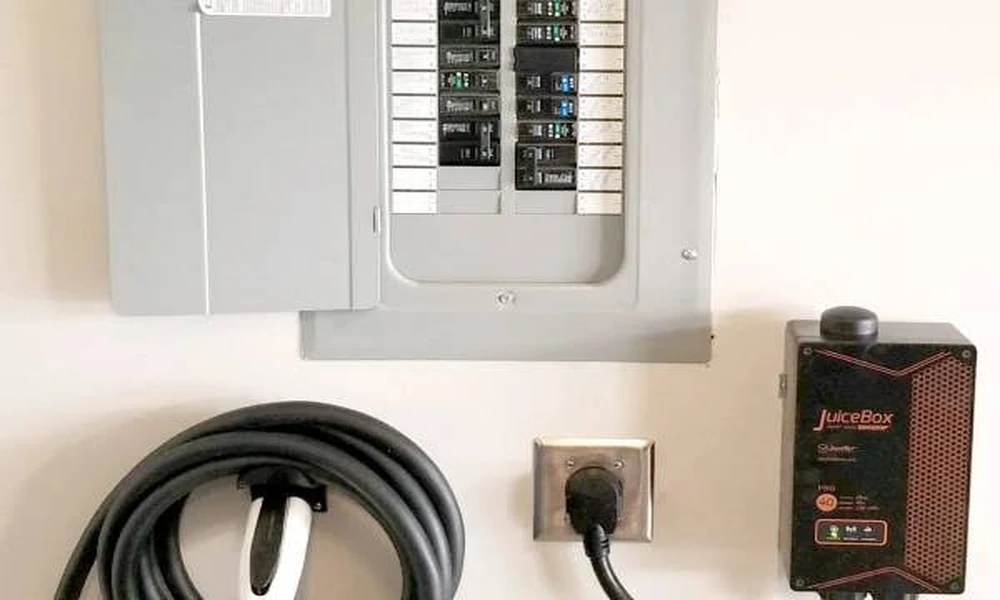
Bringing home an electric vehicle is exciting, but the first question most new owners face is a practical one: how will I charge it? The good news is that most people charge at home overnight, and a little planning makes the setup smooth and safe. The licensed team at N E Electrical walks homeowners through this process often, and this guide follows the same order they would: figure out what you need, check what your home can handle, and install it properly.
Step One: Decide Which Level of Charging You Need
There are two common options for home charging.
- Level 1 uses a standard 120 volt household outlet and the charging cord that comes with the vehicle. It is the slowest option, but it needs no special equipment.
- Level 2 uses a 240 volt circuit, similar to the one that powers an electric dryer. It charges much faster and needs dedicated charging equipment.
The U.S. Department of Energy explains in its guide to charging electric vehicles at home that many owners can meet their daily driving needs by charging overnight with Level 1, as long as an outlet on a dedicated circuit is available near where they park. Level 2 makes more sense for drivers with long commutes, irregular schedules, or vehicles with large batteries that need more time than a single night provides.
A simple way to decide is to ask yourself three questions:
- How many miles do I drive on a typical day?
- How many hours is the car parked at home overnight?
- Do I expect to add a second EV or a bigger battery later?
If your daily mileage is modest and the car sits for twelve hours, Level 1 may do the job. If your schedule is unpredictable, Level 2 gives you peace of mind.
Step Two: Choose Where the Charger Will Live
Think about the parking spot and the path from the electrical panel.
- Distance to the panel. Shorter runs are usually simpler and less expensive.
- Garage or outdoors. Garages are common, but outdoor installation is also an option. The Department of Energy notes that outdoor use is safe, even if the vehicle is being charged in the rain, as long as the equipment is rated for outdoor use.
- Cord reach. Make sure the cable can reach the vehicle’s charging port without stretching or lying across walkways.
- Future vehicles. If you might add a second EV, think about whether the location can serve two cars.
Step Three: Have Your Electrical Capacity Checked
This step is where a licensed electrician matters most. Your panel has a limited amount of capacity, and a charger can be a large new load. According to the Department of Energy, electricians can tell homeowners whether their home has adequate capacity for vehicle charging, and while some homes may fall short for Level 2, a qualified electrician can add circuits to provide the capacity needed.
During an evaluation, a professional will typically look at:
- The size and age of your electrical panel
- Available space for a new breaker
- How much of your panel’s capacity is already in use
- The condition of existing wiring and outlets
- The route for new wiring from the panel to the charging location
- Whether grounded outlets are present for a Level 1 setup
If the panel is full or aging, a panel upgrade may be part of the plan. That is not unusual, and it can prepare your home for other electric upgrades down the road.
Step Four: Choose Safe, Certified Equipment
Not all charging equipment is alike. The Department of Energy recommends buying safety-certified equipment, such as products with the ENERGY STAR label that have been tested by a nationally recognized testing laboratory, and working with a certified electrical contractor. When you shop, look for:
- Safety certification from a recognized testing lab
- Outdoor rating if the unit will be outside
- Amperage that matches your circuit and your vehicle’s needs
- A cord length that fits your parking setup
- Optional smart features, such as charging timers, if you want to schedule charging during off-peak hours
The Department of Energy points out that most Level 2 units come with standard safety features and status lights, and more advanced smart models add things like timers, displays, and communication tools.
Step Five: Plan for Permits and Codes
Charger installations are electrical work, and electrical work has rules. The Department of Energy states that installations must comply with local and state codes, and that permits may be required from your local building authority. It also notes that the National Electrical Code treats EV charging as a continuous load, which means your electrician should size the circuit with that in mind. In many areas, a site plan must be approved before work begins.
A licensed electrician usually handles the permit and inspection process for you. Ask about it up front so you know what to expect for timing.
Step Six: Understand the Costs
Costs vary with the equipment you choose, the distance from the panel, and whether any upgrades are needed. When you collect estimates, ask for a written breakdown that separates:
- The charging equipment itself
- Labor and materials for the new circuit
- Permit and inspection fees
- Any panel or service upgrade
- Trenching or conduit work for outdoor or detached locations
Also look into incentives. The Department of Energy notes that state and utility incentives may be available to offset equipment costs, and some utilities offer time-of-use rates that can lower the cost of overnight charging. Check with your electric provider before you buy.
Step Seven: Installation Day
A typical installation follows a simple sequence:
- The electrician confirms the plan and shuts off power to the panel as needed.
- A new dedicated breaker and circuit are installed.
- Wiring is run to the charging location.
- The charger or outlet is mounted and connected.
- Everything is tested, and the electrician walks you through how to use it.
- The work is inspected if required by your local authority.
Keep the paperwork, the manual, and the warranty information in one place.
Step Eight: Build Good Charging Habits
Once the charger is in, a few habits keep everything running well:
- Check the cord and plug regularly for wear, cracks, or discoloration.
- Keep the area around the charger clear and dry.
- Do not use damaged cords or extension cords for vehicle charging.
- Pay attention to any warm outlets, tripping breakers, or burning smells, and call an electrician if they appear.
- Consider scheduling charging for off-peak hours if your utility offers lower rates.
A Quick Readiness Checklist
Before you call for an estimate, gather:
- Your vehicle make and model, and its charging specifications
- A rough idea of your daily mileage
- The location where you plan to park and charge
- The age and size of your electrical panel, if you know them
- Photos of the panel (closed), the parking area, and the path between them
Having this information ready saves time and helps your electrician give you a more accurate quote.
Final Thoughts
Setting up a home charger does not need to be complicated. Decide which level fits your driving, check your home’s electrical capacity, choose certified equipment, and let a licensed electrician handle the permits and installation. Do those things in order, and you will be ready to plug in with confidence every night.
